This one is for Derek Powazek, who left a comment in the most recent transmitted-light post asking for a "'behind the scenes' type post on how you shoot these photos."
Initially I resisted the idea, because I didn't think it was really complicated enough to write a post about. I mean, really, you just get a light source, a camera, and a leaf, and you put the leaf between the light source and camera and take pictures. Nothing that complicated about it. But as I thought have I learned anything else about the process that would be useful to share?, I managed to make it complicated anyway. Yay me.
So the first thing is, you need a camera, light source, and leaf.
I have no advice about the camera part. I don't know about cameras; I've only ever had relatively cheap point-and-shoot ones. I do know you're going to need something with a very short focal length, so make sure there's a macro mode.
I have some advice about leaves. Characteristics that tend to make leaves suitable for transmitted light photos:
1. Thin (non-succulent).Thick, succulent leaves can sometimes produce serviceable photos, but to see the venation, you need a leaf that's thin enough for light to shine through. Broad leaves are useful mostly because the leaf has to be big enough to block the light source from shining on the lens. If it's not, you get lens flare.
2. Broad.
3. Variegated.
4. Flat(-tish).

Variegated leaves tend to be more interesting, or at least more colorful and dramatic, though that's a matter of personal taste. Finally, extremely curly, quilted, or twisted leaves tend to make poor subjects because only part of them can be in focus. Sometimes that works out well anyway, but I prefer flatter leaves.
The "leaves" don't always have to be leaves, either -- I've taken serviceable pictures of spathes (Spathiphyllum, Anthurium), phyllocladodes (Schlumbergera), petals/sepals (Abutilon, Tulipa, Hemerocallis), and cataphylls (Zamioculcas) before. Dead leaves also have their charms, sometimes, in the right situations.
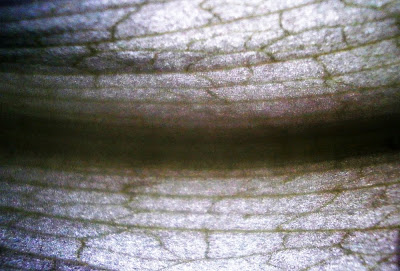
Almost any leaf can be made to work, but I particularly recommend Dieffenbachia, Caladium, Alpinia/Zingiber, Calathea, Alocasia, Zantedeschia, Strelitzia (especially S. reginae), Solenostemon, Musa, Anthurium, Codiaeum, Begonia, and Phlebodium.
The light source that works best for me is sunlight. That said, it's totally possible to get a decent image out of an artificial light; the main problem is that the color balance can come out really strange, and sometimes it can be hard to fix after the fact, like in this picture:

This happens less often with sun.
One wants to minimize reflected light as much as possible when doing this. The appeal of transmitted light photos is that the colors are highly saturated and at high contrast; if there's light coming from behind the camera, this will reflect back into the lens and wash out the color. This can also be a problem if you're taking pictures outside in a bright area, or even if you're taking pictures while wearing light-colored clothing. Wear dark clothes, and as much as possible, shoot from a dark location towards a light one.

Very light-colored leaves (e.g. some of the Dieffenbachias with white centers, Spathiphyllum spathes, pretty much any of the chartreuse cultivars of anything) tend to be difficult to get. This might be specific to my camera. It's often possible to manipulate the image afterward to increase the contrast and get something interesting out of it anyway, but not always.
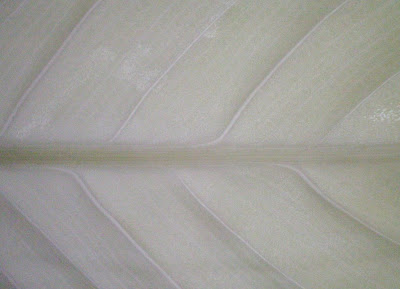
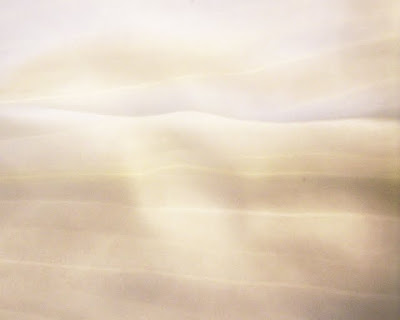 Like here (Spathiphyllum 'Golden Glow' or whatever, spathe), for example. The actual spathe is basically pure white, but in the process of cranking up the contrast so there was something to look at, all this yellowish stuff showed up. This was fixable too (reduce the saturation); I don't know why I didn't.
I usually get the best results when the light source is hitting the leaf exactly perpendicular to the leaf surface. If the light comes in at an angle to the leaf, you'll wind up with shadows everywhere. If the leaf is basically flat, this can sometimes be a good effect; if it's at all cupped, quilted, or otherwise uneven, though, I don't like it as well. With some extremely-textured leaves (like Pilea mollis 'Moon Valley,'), you're going to get shadows no matter what you do.
.jpg)
If the camera is pointed at an angle to a flat leaf, you'll have one area that's in focus, and then out-of-focus everywhere else. Sometimes that works, sometimes it doesn't. Usually, the closer you can get to aiming the camera perpendicular to the leaf surface, the better.

I'm usually trying to get these pictures while holding the leaf in one hand and the camera in the other. This means that for most shots, both my hands are moving, and the image comes out blurred. The solutions I've come up with for this:
1. Keep your hands touching one another, so that if one moves, the other has to move with it. This doesn't eliminate motion blur, but it keeps both hands moving in the same direction, so you get rid of some of it.Manipulating the images afterward is also part of the gig; I use Irfanview. I rotate the image so that the base and petiole of the leaf are on the left and the tip of the leaf is on the right, straighten it as much as possible so the midrib (if present) is strictly horizontal, crop the image, and then adjust the color until it looks right. All these steps are pretty easy to do in Irfanview, though cropping is sometimes kind of a pain, because of a quirk that happens when the image size is reduced down to about 20-25% of normal. A typical process goes something like this (using a bract from an unidentified Euphorbia pulcherrima variety as my example):
2. Tape the leaf to something. I've had decent luck taping leaves to the shade of the fluorescent light on Nina's terrarium; I've also been able to tape leaves to windows at certain times of day. If you use a tiny piece of tape, and only on the very edges of the leaf (which won't show in the picture anyway), this can be very helpful. This doesn't work when there's a screen on the window, though:Dieffenbachia 'Camouflage,' photographed against a screened window. It's an interesting effect, but not really the kind of thing I'm usually going for.
3. Find a tripod. I often stack up soup cans and rest the camera on the cans when taking pictures. This doesn't reduce camera motion entirely, but it helps, and it's easy to set up, take down, and adjust. Plus then you can have soup when you're finished taking pictures.
4. Take lots of pictures. Sometimes you just have to take 25 pictures and hope that one of them turns out.
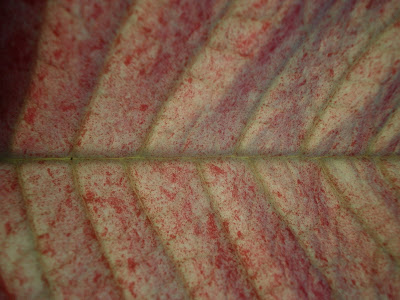
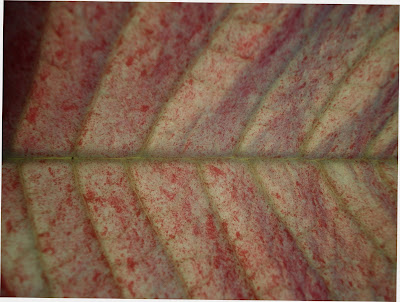 After rotating it slightly to get the midvein horizontal.
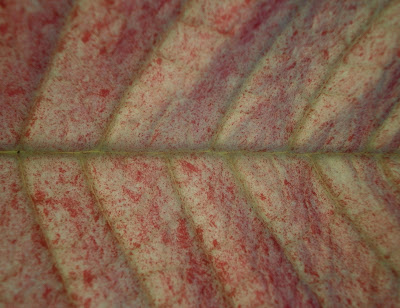 Cropped to remove the shadow of another bract on the left.
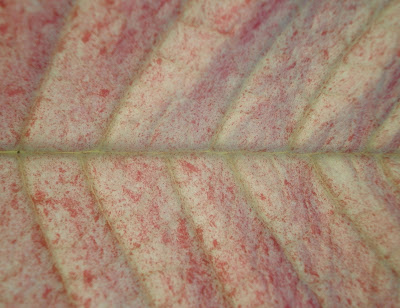 Lightened with the "gamma correction" function. (I don't know what gamma is or why it needs correcting, but this gives better results than adjusting the brightness.)
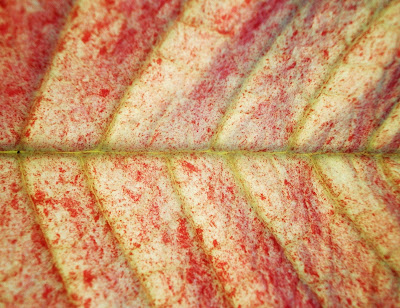 I increased the contrast until it looked more or less right.
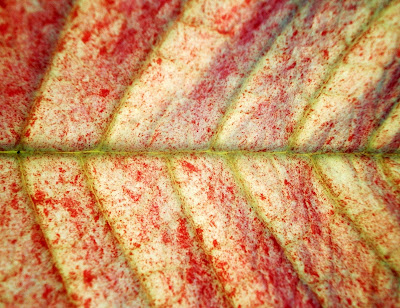 I used the auto-adjust color, which increased the contrast a little more and darkened the image slightly.
There are often other steps involved in the photo processing: if everything's too yellow, I can turn up the blue a little; if it's washed-out, I can increase contrast; if it's a little fuzzy, I can sharpen the image. That sort of thing. Often, something that looks just fine on my computer will look like crap once I upload it to the blog, but them's the breaks.
So I think that's all I've got. Go. Go try it for yourself.



3 comments:
Mr Subjunctive this is superb. Also find myself mightily drawn to the Church of the FSM.
And here I was thinking you had some kind of complicated setup using lights and glass and stuff. Very cool. Thank you!
Beautiful. I love your posts and I am using your blog to help me prepare for the Philadelphia Flower Show because your plant descriptions are better than anyone else's. Thanks for the great writing (including the comments in the post about Martha Stewart's commas!). I will be linking to your blog at my less ambitious one at:
http://flowershowminiatures.wordpress.com/
Post a Comment